Configuration
Suggest editsImplementing Thales CipherTrust Manager with EDB Postgres Advanced Server 15.2 and above or EDB Postgres Extended 15.2 and above requires the following components:
Note
The EDB Postgres Advanced Server version 15.2 and above and EDB Postgres Extended Server version 15.2 and above, products will be referred to as EDB Postgres distribution. The specific distribution type will be dependent upon customer need or preference.
- EDB Postgres Distribution (15.2 or later)
- Thales CipherTrust Manager
- Pykmip
- Python
Prerequisites
- A running EDB Postgres distribution.
- Thales CipherTrust Manager installed and deployed per your environment.
Check/Install Python on Server
Many Unix-compatible operating systems such as macOS and some Linux distributions have Python installed by default as it is included in a base installation.
To check your version of Python on your machine, or to see if it is installed, simply type python3 and it will return the version. You can also type ps -ef |grep python to return a python running process.
root@ip-172-31-46-134:/home/ubuntu# python
Python 3.8.10 (default, May 26 2023, 14:05:08)
[GCC 9.4.0] on linux
Type "help", "copyright", "credits" or "license" for more information.
If you run a check and find that your system does not have Python installed, you can follow the docs and download it from Python.org. Simply select your specific OS and download and install on your system.
Install Pykmip
Once you have your EDB Repository installed on your server, you can then install the Pykmip utility that is needed.
- As
rootuser issue theinstall python3-pykmipcommand, for our example we have a RHEL8 server so it would bednf install python3-pymkip.
The output should look something like:
[root@ip-172-31-7-145 ec2-user]# dnf install python3-pykmip
Updating Subscription Management repositories.
Red Hat Enterprise Linux 8 for x86_64 - AppStre  63 MB/s |  58 MB     00:00
Red Hat Enterprise Linux 8 for x86_64 - BaseOS   71 MB/s |  62 MB     00:00
Red Hat Ansible Engine 2 for RHEL 8 (RPMs) from  19 MB/s | 2.5 MB     00:00
RHUI Client Configuration Server 8               45 kB/s | 3.7 kB     00:00
Last metadata expiration check: 0:00:01 ago on Thu 06 Jul 2023 01:30:54 PM UTC.
Dependencies resolved.
================================================================================
 Package            Arch   Version         Repository                      Size
================================================================================
Installing:
 python3-pykmip     noarch 0.9.1-1.el8     enterprisedb-enterprise-noarch 401 k
Installing dependencies:
 python3-sqlalchemy x86_64 1.3.2-2.module+el8.3.0+6646+6b4b10ec
                                           rhel-8-appstream-rhui-rpms     1.9 M
Enabling module streams:
 python36                  3.6

Transaction Summary
================================================================================
Install  2 Packages

Total download size: 2.3 M
Installed size: 13 M
Is this ok [y/N]: y
Downloading Packages:
(1/2): python3-sqlalchemy-1.3.2-2.module+el8.3.  23 MB/s | 1.9 MB     00:00
(2/2): python3-pykmip-0.9.1-1.el8.noarch.rpm    450 kB/s | 401 kB     00:00
--------------------------------------------------------------------------------
Total                                           2.5 MB/s | 2.3 MB     00:00
Running transaction check
Transaction check succeeded.
Running transaction test
Transaction test succeeded.
Running transaction
  Preparing        :                                                        1/1
  Installing       : python3-sqlalchemy-1.3.2-2.module+el8.3.0+6646+6b4b1   1/2
  Installing       : python3-pykmip-0.9.1-1.el8.noarch                      2/2
  Running scriptlet: python3-pykmip-0.9.1-1.el8.noarch                      2/2
  Verifying        : python3-pykmip-0.9.1-1.el8.noarch                      1/2
  Verifying        : python3-sqlalchemy-1.3.2-2.module+el8.3.0+6646+6b4b1   2/2
Installed products updated.

Installed:
  python3-pykmip-0.9.1-1.el8.noarch
  python3-sqlalchemy-1.3.2-2.module+el8.3.0+6646+6b4b10ec.x86_64

Complete!
Configure Thales CipherTrust Manager for your EDB Postgres Distribution
Follow the steps outlined below to create the required certificates after you have successfully gotten Thales CipherTrust Manger up and running.
Login to Thales CipherTrust Manager and Create User
A user needs to be created for future authentication when creating a key on Thales CipherTrust Manager with EDB Postgres distribution. It verifies the username and password against the Thales CipherTrust Manager internal database.
Login to the Thales CipherTrust Manager UI.
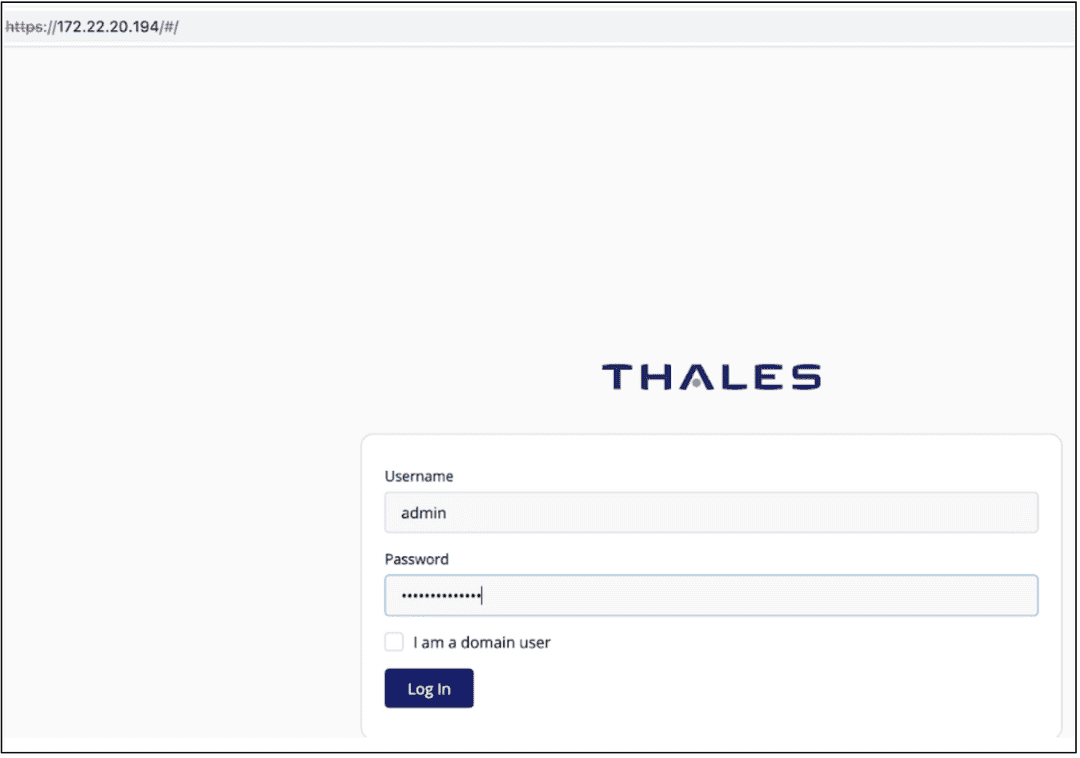
Navigate to the Access Management section and select
Users.Select
Add Usersand provide the required information:
- Username
- Password
Click on
Add User.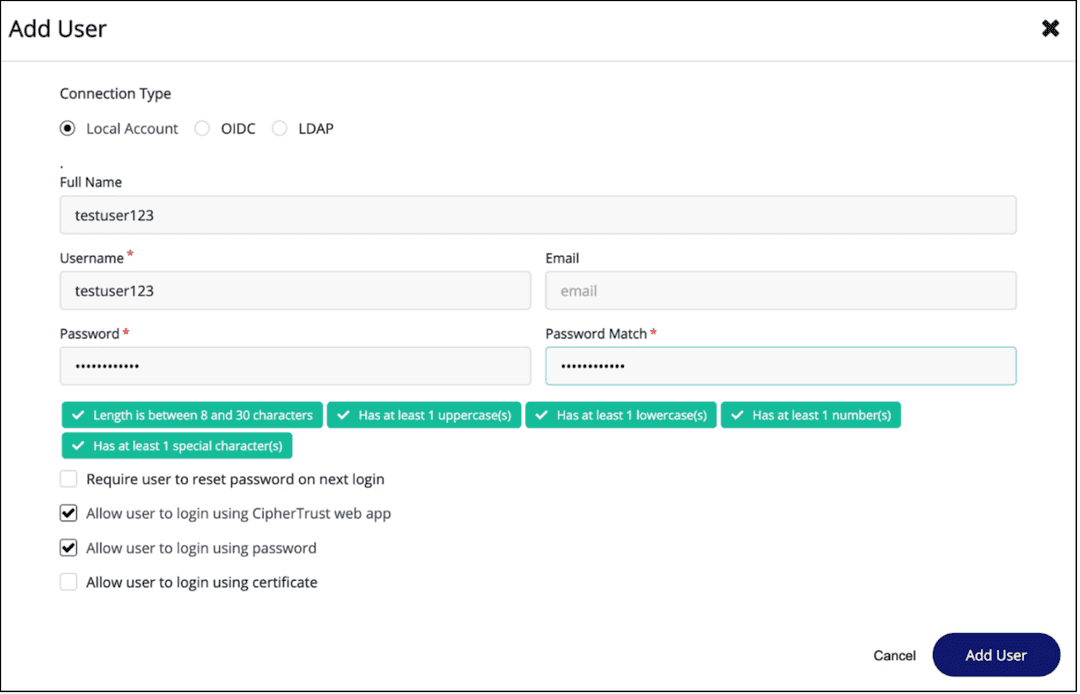
Click on the
...beside the user you just created and select the View/Edit option.Click on
Expand Alland select/add the following groups for the user:
Key AdminsKey UsersAll Clients
The user that you created now has the appropriate settings and permissions to create and download certificates in Thales.
Create and Download Certificates on Thales CipherTrust Manager
You will need ca.pem, key.pem and cert.pem certificates generated in Thales CipherTrust Manager for your KMIP server and pykmip.conf file.
Download the CA Certificate
The local CA Certificate is provided by default and the below steps will show you how to access and download it for your pykmip.conf file.
Navigate to CA on the left-hand side and click on
Localto be taken to the Local Certificate Authorities page.Click on the
...on the far right side and clickDownload.
For your download change the name from
Certificate.pemtoca.pem. Keep track of where you downloaded your certificate as you will need it later.
Create and Download the Key.pem and Cert.pem Certificates
These are the other two certificates you will need for your KMIP server and pykmip.conf file.
Navigate back to the Thales CipherTrust Manager main page.
On the main page, select
KMIPfrom options under Products.Click on
Client Profileand selectAdd Profile.Give the profile a name and select
Save. In our example we usednewtestprofile.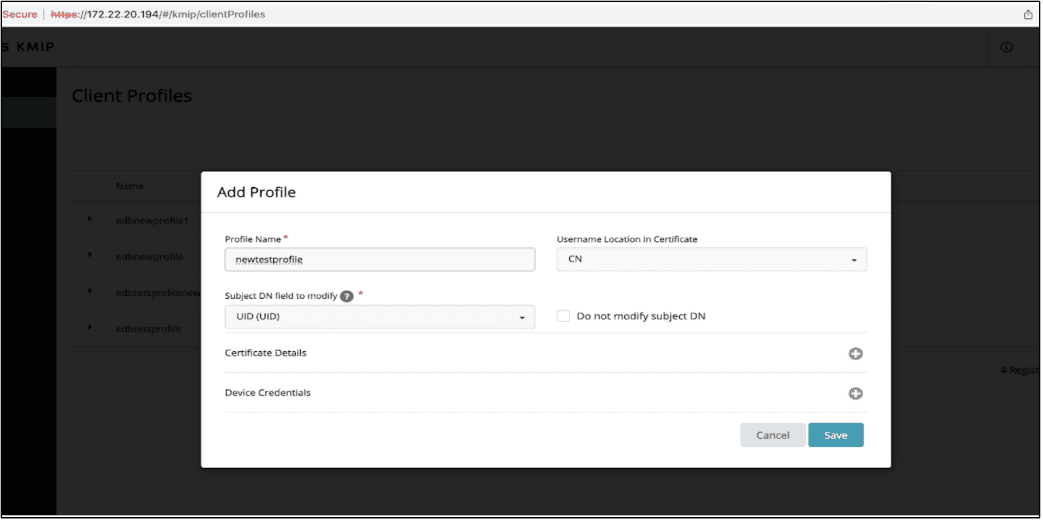
Click on
Registration Tokenand selectNew Registration Token.Click on
Beginand then follow the below steps to configure your token:
- Give the token a name, in our example
edbnewtoken2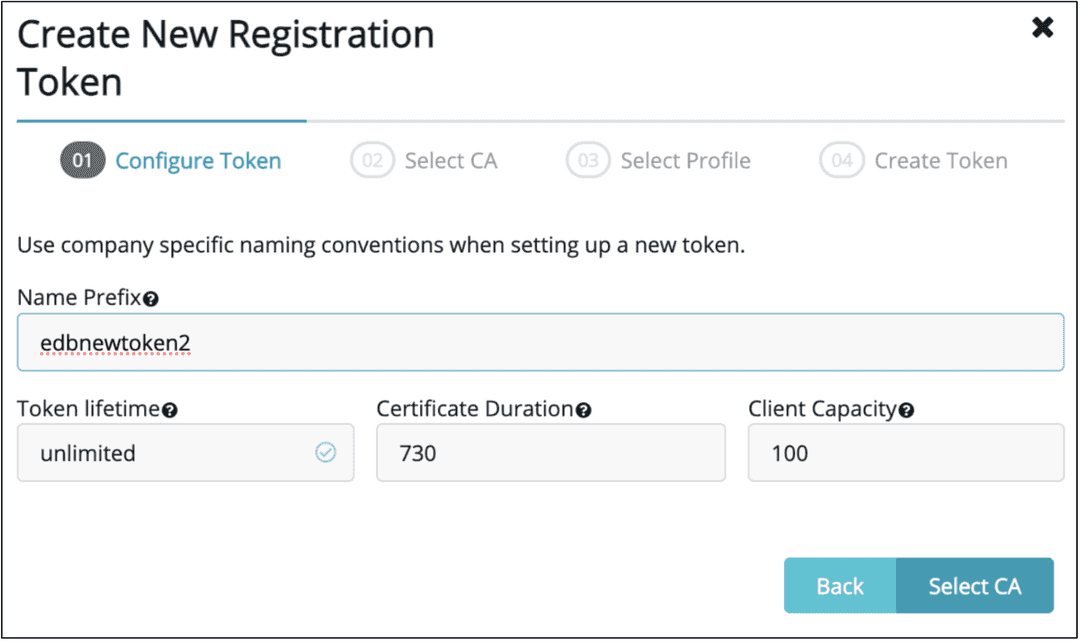
- Select
local CA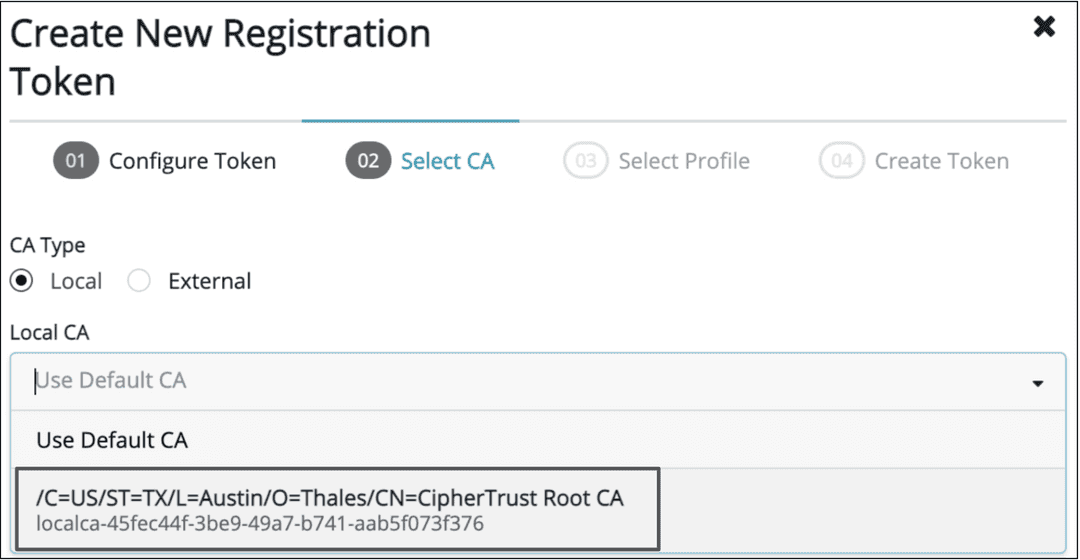
- Select the Client Profile you created above, in our example
newtestprofile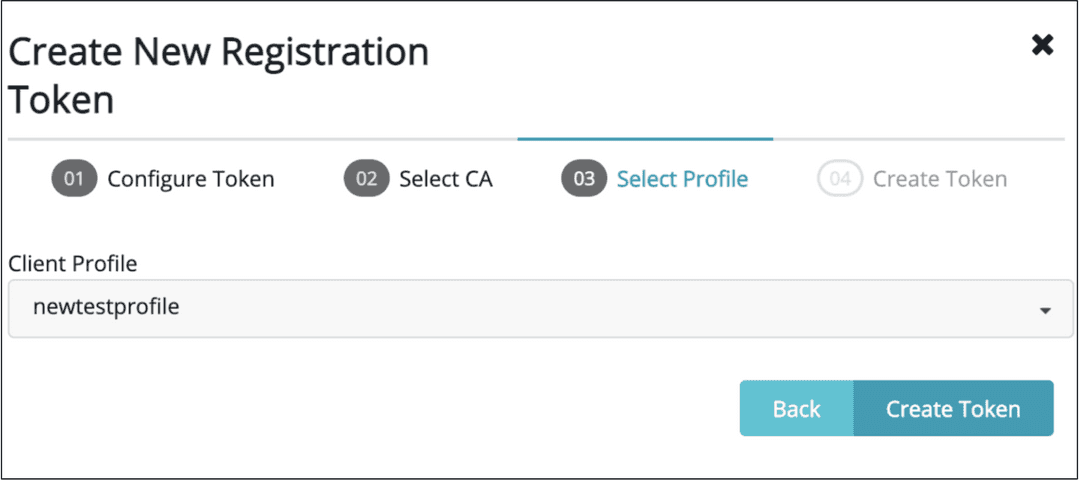
- Select
Create Token - Copy the Token that was created
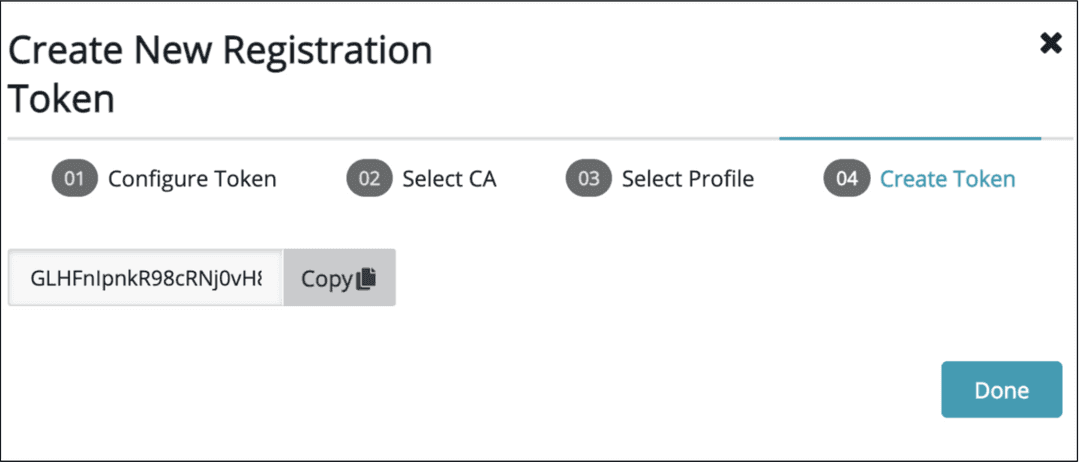
- Click on
Done
Navigate to Registered Clients and select
Add Client.Give the Client a name.
Paste the token that you copied above into the
Registration Tokenbox and then pressSave. This will generate the final two certificates.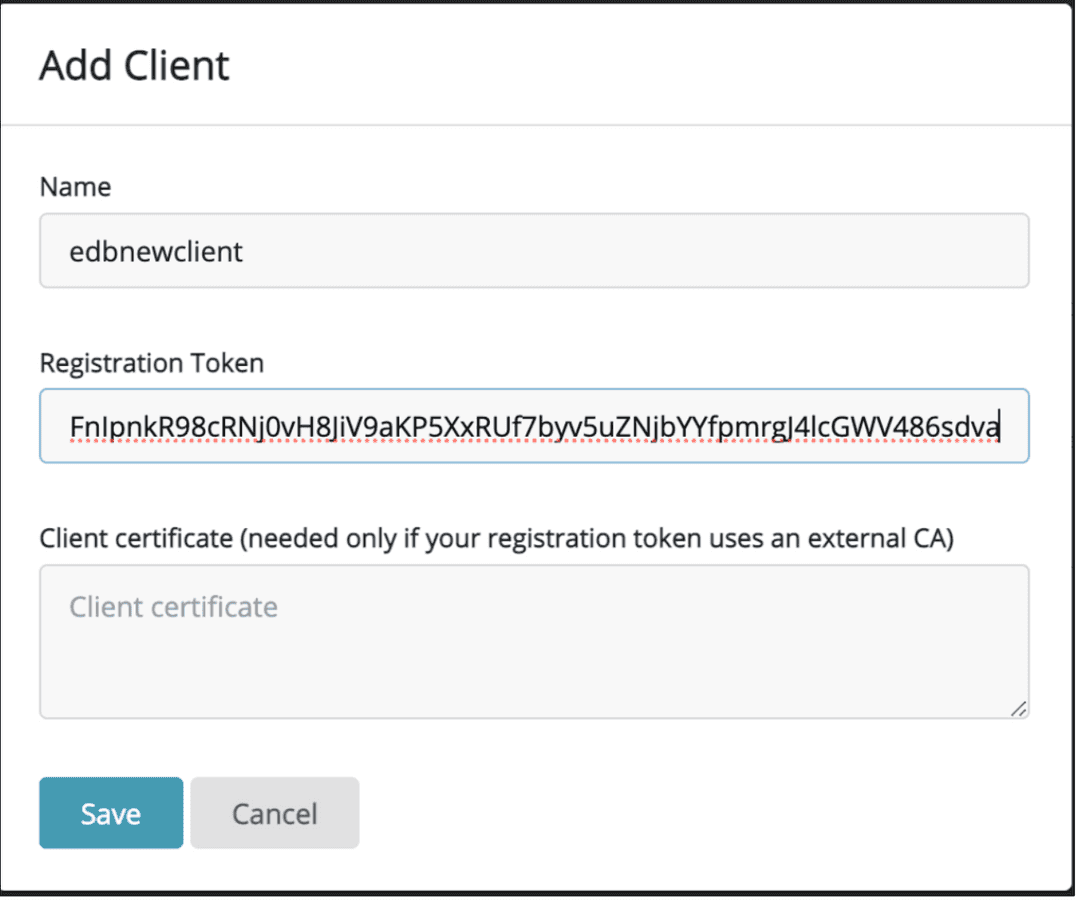
Click on
Save Private Keyand click onSave Certificate, to download the final two certificates. Make sure to note their downloaded location for later.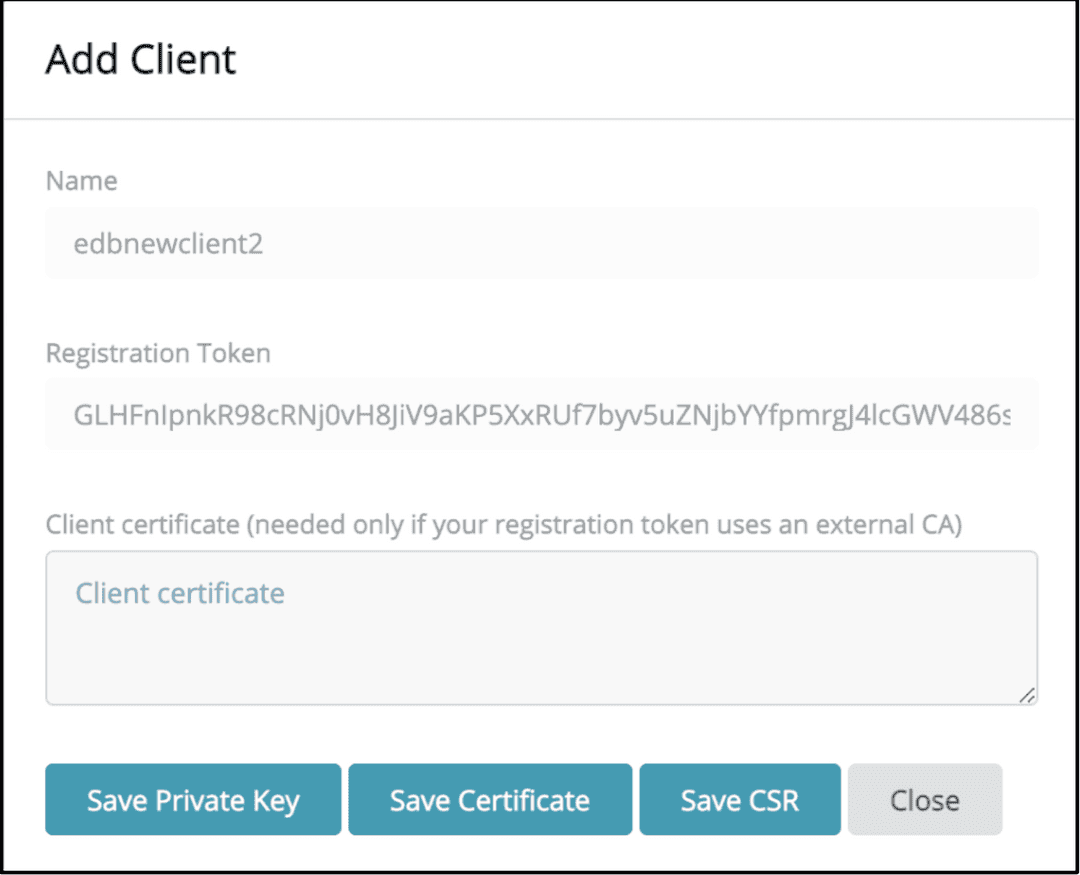
You are now ready to use Thales CipherTrust Manager and your EDB Postgres distribution with TDE for key management.
Could this page be better? Report a problem or suggest an addition!